Building a Visual Novel Engine Part 1 - Route Graphics
This series will explain the whole architecture and design of RouteVN Creator. By the end of the series, you should have a good understanding of how RouteVN Creator works, and essentially how to build a Visual Novel engine from scratch.
This is part 1 of a 3 part series:
- Part 1 - Route Graphics: a declarative graphics and sound library
- Part 2 - Route Engine: a Visual Novel engine built on Route Graphics
- Part 3 - RouteVN Creator: a Desktop application to create Visual Novels without any coding
Route Graphics
Route Graphics is responsible for handling any visual and audio changes on the screen.
If we want to change any pixels or audio, it will be done through route-graphics.
It provides all necessary graphic primitives to build a visual novel, but the library itself does not mention or have any knowledge about Visual Novels. It is designed to be a general graphics library that can be used for any other use cases.
Route Graphics is a declarative library built based on PixiJS.
Below is an example of a typical Visual Novel screen:
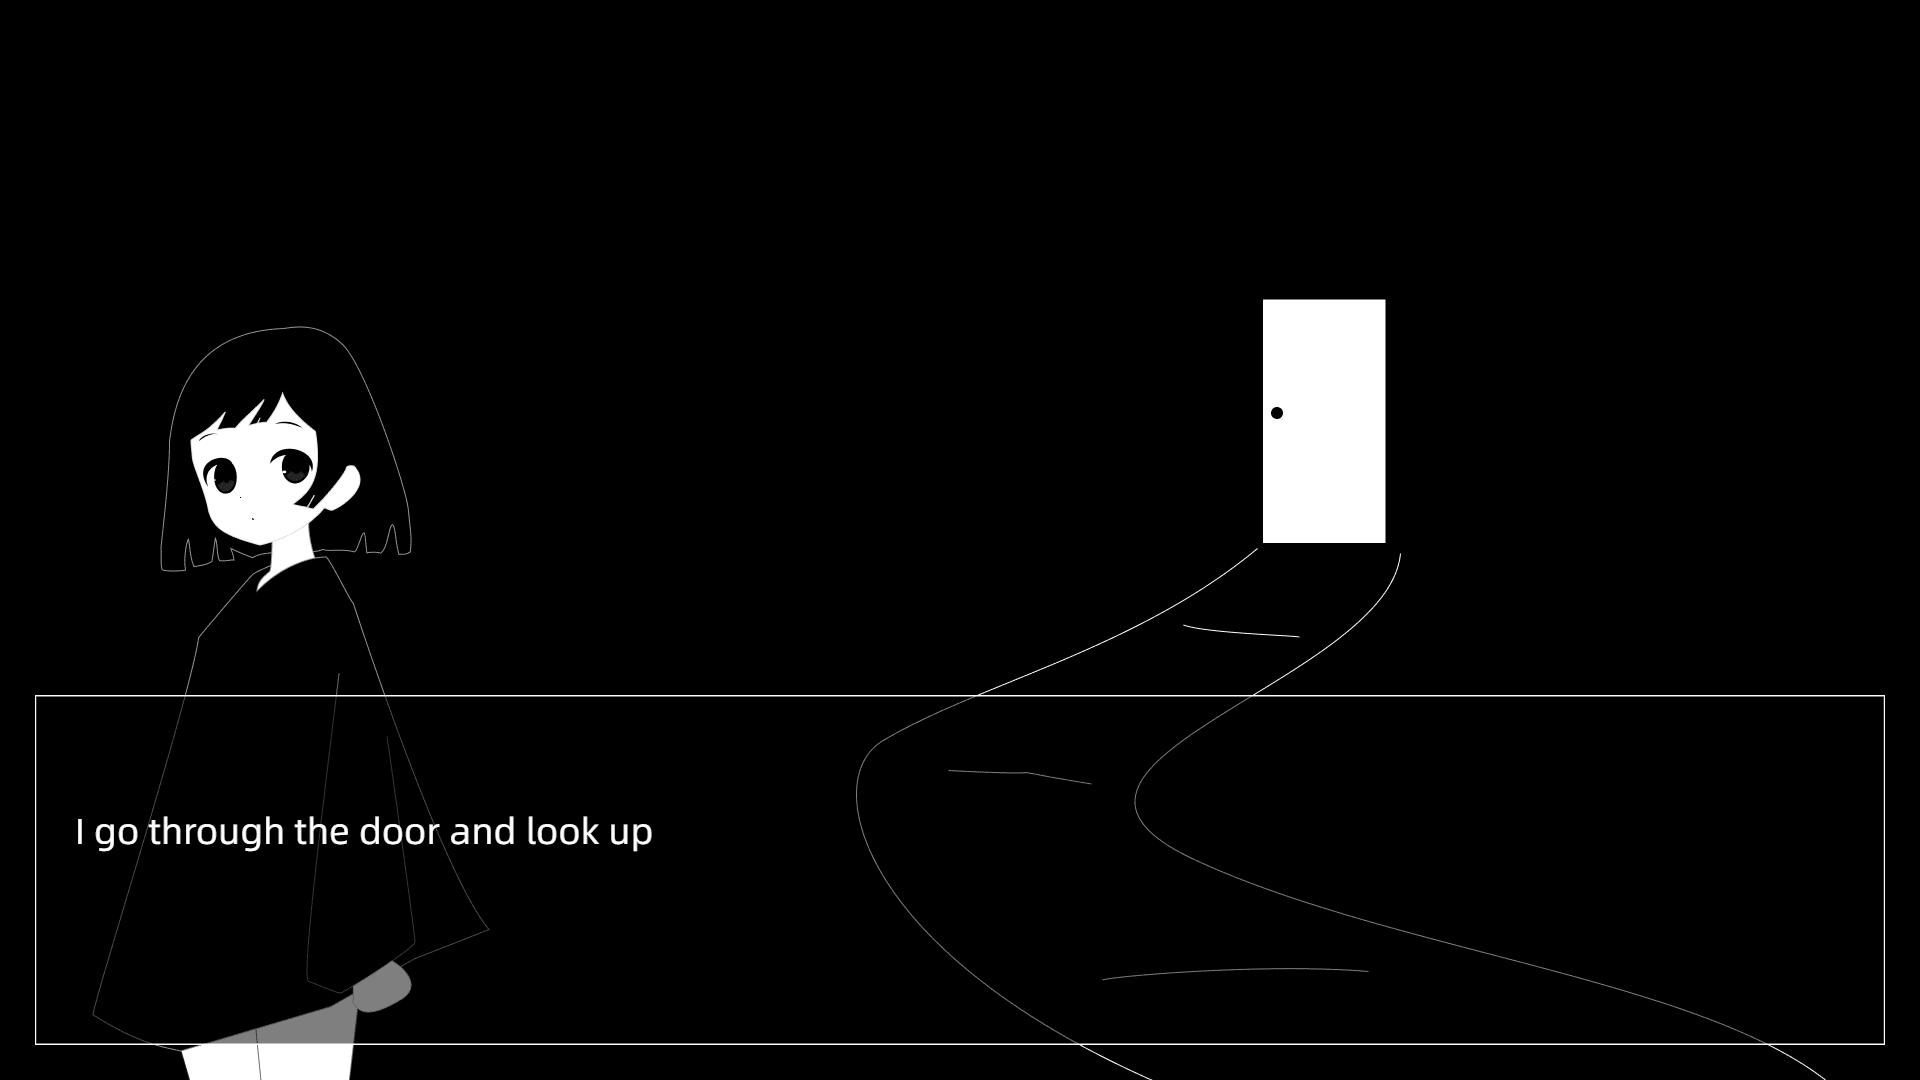
The above screen was created using Route Graphics's declarative interface:
elements:
  - id: bg # Background image
    type: sprite
    src: bg-1
    width: 1920
    height: 1080
  - type: container # Character
    id: character-container
    x: 300
    y: 1080
    anchorX: 0.5
    anchorY: 1
    children:
      - type: sprite
        id: character-container-1
        src: char-sprite-1
        width: 553
        height: 865
        x: 0
        y: 0
  - id: dialogue-container
    type: container
    x: 35
    y: 695
    width: 1850
    height: 350
    children:
      - id: dialogue-box # Dialog box UI image
        type: sprite
        width: 1850
        height: 350
        src: dialogue-box-1
      - id: dialogue-content # Dialogue text content
        type: text
        x: 40
        y: 110
        width: 1440
        height: 140
        content: I go through the door and look up
The power of Route Graphics's declarative interface is that you can create any visuals on the screen just by updating a JSON/YAML object.
Declarative vs Imperative
Route Graphics is built on top of PixiJS.
PixiJS has an imperative interface. We built Route Graphics to have a declarative interface.
Declarative: You define the end state, and the library figures out how to get there.
Imperative: You write surgical, step-by-step instructions to reach the desired state.
We wanted a declarative interface because it is much easier to work with, easier to reason about and more predictable. You simply need to make sure the end state is correct, and the library handles everything else.
While designing the declarative interface, we took the freedom to adapt the interface to better fit our use cases, meaning we do not map the API one-to-one with the PixiJS API. It is a whole new interface.
PixiJS
PixiJS was chosen because
- It works on the web, which is one of the most accessible platforms out there
- It is performant and it supports 3 types of renderers: WebGPU, WebGL, and canvas
- The interface is easy to use with good documentation
- Mature: has been around for many years, and used by successful game engines
So far PixiJS has met our expectations for its stability and performance.
Audio
We wanted a unified library for both graphics and audio.
We could not think of a better name for the library, so we ended up sticking with Route Graphics, but it also handles audio.
PixiJS itself does not support audio, so we implemented sounds using the WebAudio API.
Similarly to how we wrapped PixiJS with a declarative interface, we also wrapped the WebAudio API with a declarative interface.
Plugin System
Route Graphics is designed with a plugin system, where functionality is added by implementing new plugins.
Plugins are independent of each other meaning you can add and remove the plugins based on what you need.
For adding new functionality, we need to create a new custom plugin without worrying about impacting existing ones.
The current supported plugins are:
Elements:
- Container
- Sprite
- Rect
- Slider
- Text
- Text Revealing
- Particles
- Animated Sprite (Spritesheet)
Animations:
- Tween
Audio:
- Sound
Some of the plugins are straightforward and similar to what PixiJS has; below we will go through some of the more interesting ones.
Tween Animations
Animations, or more precisely tween animations are implemented using PixiJS Ticker.
Tween animations are essentially changes in a property value over time.
Below is an example showing fade-in and fade-out effects, which are very common for background transitions:
elements:
  - id: "bg"
    type: "sprite"
    x: 0
    y: 0
    src: cg-door
    width: 1280
    height: 720
animations:
  - id: "bg-cg-animation-in"
    type: "tween"
    targetId: "bg"
    properties:
      alpha:
        initialValue: 0
        keyframes:
          - duration: 1500
            value: 1
            easing: "linear"
            relative: false
          - duration: 1000
            value: 1
            easing: "linear"
            relative: false
          - duration: 1500
            value: 0
            easing: "linear"
            relative: false
Below is an example of moving a character:
elements:
  - id: "bg"
    type: "sprite"
    x: 0
    y: 0
    src: cg-door
    width: 1280
    height: 720
  - id: "char"
    type: "sprite"
    x: 300
    y: 720
    anchorX: 0.5
    anchorY: 1
    src: makkuro-sprite
    width: 368
    height: 546
animations:
  - id: "bg-cg-animation-in"
    type: "tween"
    targetId: "char"
    properties:
      x:
        keyframes:
          - duration: 1500
            value: 500
            easing: "linear"
            relative: true
          - duration: 1000
            value: -300
            easing: "linear"
            relative: true
      y:
        keyframes:
          - duration: 2500
            value: 0
            easing: "linear"
            relative: true
          - duration: 300
            value: 100
            easing: "linear"
            relative: true
          - duration: 300
            value: -200
            easing: "linear"
            relative: true
          - duration: 300
            value: 200
            easing: "linear"
            relative: true
          - duration: 300
            value: -100
            easing: "linear"
            relative: true
The primitives keyframes with duration, value, and easing are surprisingly powerful and sufficient to realize a rich variety of interesting animations.
Particles
PixiJS itself provides a particle primitive, but does not provide a high-level implementation to get interesting effects.
Luckily, there was a library called PixiJS Particle Emitter which actually implemented many of the common particle effects.
We took this library and made a plugin out of it. Below is an example of a snow effect:
elements:
  - id: "snow-effect"
    type: "particles"
    width: 1280
    height: 720
    alpha: 0.5
    texture: "snowflake"
    behaviors:
      - type: "spawnShape"
        config:
          type: "rect"
          data:
            x: 0
            y: -20
            w: 1280
            h: 10
      - type: "movePoint"
        config:
          speed:
            min: 50
            max: 150
          direction: 90
      - type: "scaleStatic"
        config:
          min: 0.3
          max: 1.0
      - type: "alpha"
        config:
          list:
            - value: 0
              time: 0
            - value: 0.8
              time: 0.1
            - value: 0.8
              time: 0.8
            - value: 0
              time: 1
      - type: "rotation"
        config:
          minStart: 0
          maxStart: 360
          minSpeed: -45
          maxSpeed: 45
    emitter:
      lifetime:
        min: 4
        max: 8
      frequency: 0.05
      particlesPerWave: 2
      maxParticles: 200
      emitterLifetime: -1
      spawnBounds:
        x: -50
        y: -50
        width: 1380
        height: 820
      recycleOnBounds: true
      seed: 12345
Text Revealing
Text Revealing is a plugin that implements a very common feature seen in Visual Novels. It also supports more advanced features such as rich text and furigana.
The challenge of implementing this was to calculate the position and dimensions of the text so it can be positioned correctly. Those calculations are done using CanvasTextMetrics.measureText provided by PixiJS.
elements:
  - id: "showcase-text"
    type: "text-revealing"
    content:
      - text: "Hello"
        textStyle:
          fontSize: 32
          fill: "#ffffff"
          fontFamily: "Arial"
          fontWeight: "bold"
      - text: "World"
        textStyle:
          fontSize: 36
          fill: "#3498db"
          fontFamily: "Arial"
        furigana:
          text: "世界"
          textStyle:
            fontSize: 14
            fill: "#ffffff"
            fontFamily: "Arial"
      - text: "!"
        textStyle:
          fontSize: 28
          fill: "#ffffff"
          fontFamily: "Arial"
          fontStyle: "italic"
      - text: " This is a demonstration of the text-revealing element with clean white text on a black background, with just a subtle accent color for visual interest."
        textStyle:
          fontSize: 20
          fill: "#ffffff"
          fontFamily: "Georgia"
          lineHeight: 1.4
    revealEffect: typewriter
    x: 200
    y: 200
    width: 600
    alpha: 1
Event system
In Visual Novels, we have click and drag events. We implemented an event system with declarative code as well.
elements:
  - id: 'rect-right-click-1'
    type: "rect"
    x: 200
    y: 100
    width: 300
    height: 100
    fill: "#3498db"
    rightClick:
      actionPayload:
        message: "Rect 1 right-clicked"
The client will receive the event with a payload. The client will be responsible for actually handling this event.
This is exactly how Route Engine is able to define click events, so when a user clicks on the screen Route Engine will proceed to the next line.
Implementation Details
Below we discuss more on some of the challenges and details of implementing the library.
Diff Algorithm
One key aspect of building a declarative library is the diff algorithm.
Each time the render function is called, we compare the previous and the next state. The output of this comparison is a list of all nodes that need to be either added, updated, or deleted. Each node has an id, and we check for whether the properties of the node have changed.
Add and delete are more straightforward. Update is more involved, as you need to make sure to update only the things that have changed.
This is important to ensure that each render function is idempotent and only the necessary updates are being performed.
Computed state
Our first implementation of Route Graphics was more naive. We ran into issues and complicated code because we were doing calculations and execution at the same time.
Calculations are things like calculating the final X and Y position of the element. It also includes calculating the width and height of text elements.
Execution is actually calling the PixiJS functions to apply the graphics.
Our learning was that we could transform all the original state into a computed state first and then have it go through the execution.
The execution becomes much simpler as it only has to take the existing properties and execute the respective PixiJS functions.
Aborts and async code
Unlike normal render functions where it executes and ends immediately, things like animations and revealing text continue to execute even after render.
One issue is what happens if state is updated before the previous animations have concluded. Think of clicking the screen while a background transition is still ongoing.
At first we had implemented this with JavaScript Promises and Abort Controller. However, working with many async and await became difficult, especially when there were multiple async operations going on at the same time and the outcome became difficult to predict.
We solved this with a centralized event bus that coordinates and better manages all asynchronous events.
Where Route Graphics is Used
Route Graphics powers the live preview in the scene editor.
And that is also why in the live preview we can have an accurate and consistent with the end product.
The live preview is fast because PixiJS is fast, and Route Graphics's diff algorithm makes sure that only what changed gets actually updated.
We also use Route Graphics for the Tween Animations and Transform page previews.
All Visual Novels exported from RouteVN Creator include Route Graphics to handle graphics and audio rendering.
Contributors
A shoutout to the library contributors:
- han4wluc: Main author
- Nghia: Rewriting the library to have the computed state
- JeffY: Designing and implementing Particles plugin, and other improvements
- 738NGX, Nellow: Various bug fixes and testing
Closing
Route Graphics is open source under the MIT License.
If you liked this article, consider giving it a star on GitHub.
You can see more examples from the Route Graphics Playground.
In the next post, we will be talking about Route Engine and how we designed a system that implements a full Visual Novel engine with less than 5000 lines of code.
Next: Part 2 - Route Engine